How to Do a Squat With Good Form
A step-by-step guide to squat form: stance, bracing, depth, knee tracking, the most common mistakes and how to fix them, plus easier and harder variations.
Contents
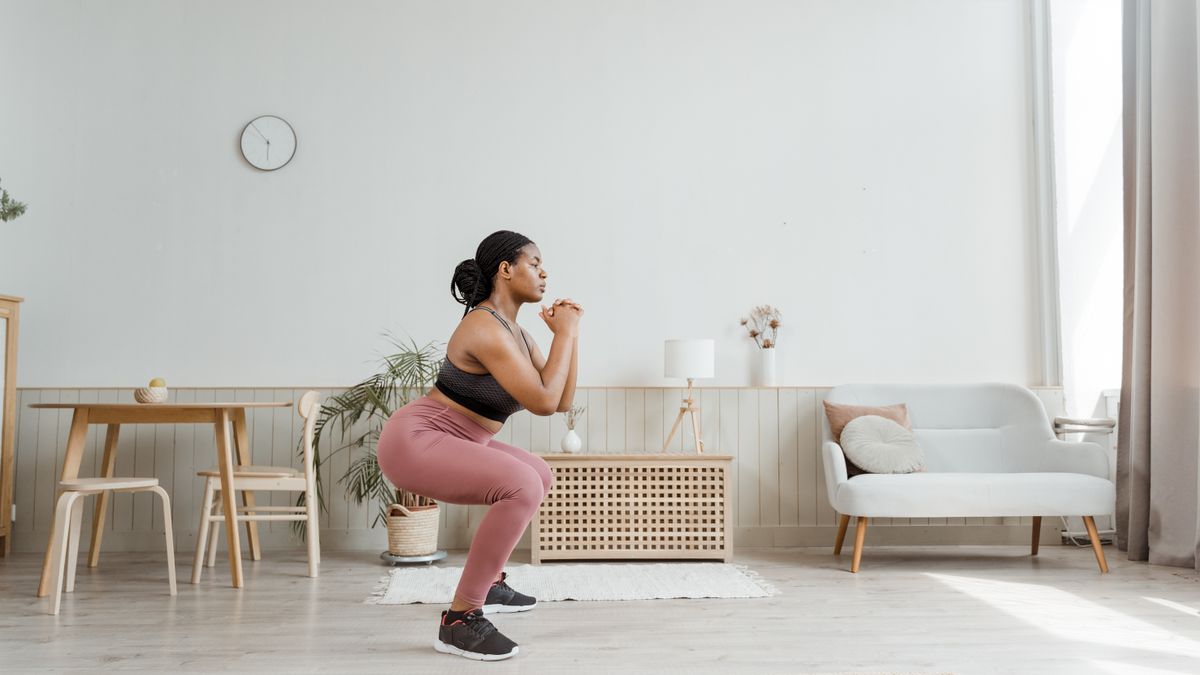
To do a squat with good form, stand with your feet about shoulder-width apart and your toes turned slightly out. Take a breath and tighten your midsection, then bend at the hips and knees together, keeping your whole foot on the floor and your knees following the line of your toes. Go as low as you can while your back stays in a steady position, then push through your feet to stand back up.
A quick safety note first. If you have knee, hip or back pain, a recent injury, a heart or blood pressure condition, or you're pregnant, talk to a doctor or physical therapist before adding squats to your routine. Muscle effort and some next-day soreness are normal. Sharp, pinching or worsening joint pain is not, and it means you should stop the set.
Set up your stance
Your stance decides how comfortable the rest of the squat will feel, so it's worth a minute of experimenting.
- Width: Start with your heels roughly under your shoulders, or a little wider. People with longer thighs often feel better a bit wider.
- Foot angle: Turn your toes out somewhere around 10 to 30 degrees. There's no single correct angle. Pick the one that lets you sit down between your knees without your heels lifting.
- Weight: Spread your weight across the whole foot: the heel, the ball of the big toe and the ball of the little toe. Think of your foot as a tripod.
- Arms: For a bodyweight squat, hold your arms out in front or clasp your hands at your chest as a counterbalance.
Test a few widths and angles, then keep whatever feels most stable.
Brace before you go down
Bracing means stiffening your trunk so your spine holds its position while your hips and knees do the work. A braced trunk passes force from your legs to whatever you're lifting, and it keeps your lower back from rounding or arching as you move.
To brace, breathe in through your nose, then tighten your stomach muscles as if someone were about to poke you in the belly, without sucking it in or pushing it out. Hold that tension on the way down and up, and breathe out near the top.
With heavier weights, many lifters briefly hold their breath during each rep to brace harder. That raises blood pressure for a moment, so if you have high blood pressure or a heart condition, keep breathing steadily and ask your doctor what's appropriate for you.
The squat, step by step
- Set your stance and brace.
- Bend your hips and knees at the same time. Think of sitting down between your heels, not reaching back for a chair far behind you.
- Keep your chest facing forward. Some forward lean of the torso is normal, especially with longer legs.
- Let your knees travel forward and slightly out, in line with your second or third toe.
- Lower yourself under control, taking about two to three seconds.
- Stop at the lowest point where your heels stay down and your lower back hasn't started to round under.
- Push your whole foot into the floor and stand up, letting your hips and shoulders rise at the same rate.
- Finish tall with your hips straight, without leaning back. Reset your breath and repeat.
How deep should you go?
There's no universal depth requirement. A common target is getting the tops of your thighs about parallel to the floor, but you don't need to hit that on day one. The best depth is the deepest one you can reach while your heels stay down, your knees track over your feet, and your lower back keeps roughly the shape it started in.
If your pelvis tucks under and your lower back rounds at the very bottom (often called "butt wink"), a little of this with body weight usually isn't a concern. If it's large, or it shows up with weight on your back, stop just above that point and build depth gradually.
Can your knees go past your toes?
Yes. The old rule that your knees should never pass your toes doesn't hold up well. How far your knees move forward depends on your leg length, ankle mobility and torso angle, and many people, especially tall people, need their knees past their toes to squat with good balance.
A 2003 study by Fry and colleagues in the Journal of Strength and Conditioning Research found that stopping the knees from moving forward reduced the load on the knees but considerably increased it on the hips and lower back, because the torso had to lean much further forward. Schoenfeld's 2010 review in the same journal also treats some forward knee travel as normal.
Direction matters more: knees should follow the toes rather than collapse inward. If moving your knees forward hurts, shorten the range and get it checked.
Common mistakes and how to fix them
Most squat problems fall into a handful of patterns. Here's what each one looks like and what to try.
Knees caving in. Your knees drift toward each other, often on the way up. Lighten the load, think "spread the floor" with your feet, and slow down the lowering phase so you have time to keep them in line.
Heels lifting. Your weight shifts onto the balls of your feet. Widen your stance a little, turn your toes out more, try a goblet squat, and work on ankle mobility.
Hips shooting up first. Your hips rise before your chest, which turns the lift into more of a bend-over. Use less weight, think "chest and hips rise together," and add pause squats to build strength at the bottom.
Losing your brace. Your stomach goes soft and your back rounds or arches. Reset your breath and brace before every rep, and do fewer reps per set so fatigue doesn't creep in.
Going too deep too soon. Your pelvis tucks hard and your lower back rounds at the bottom. Squat to a box at a height where your back stays steady, then lower the box over the weeks.
Rushing. You drop fast and bounce out of the bottom. Count two to three seconds on the way down and pause briefly at the bottom.
Too much weight. Your form changes noticeably within the set. Pick a load you could lift two or three more times with the same form.
If you can, film a set from the side and the front. A phone propped on a shelf will show things you can't feel.
Make it easier
If a full bodyweight squat feels shaky, these versions help you learn the pattern.
- Box or chair squat: Squat until you lightly touch a sturdy chair or box behind you, then stand without rocking. It shows you where your depth is and gives you a safety net. Lower the height over time.
- Assisted squat: Hold a door frame or sturdy railing and use your arms lightly for balance. This often lets you sit deeper with a more upright torso.
- Goblet squat: Hold a dumbbell or kettlebell vertically against your chest. The weight in front acts as a counterbalance, which helps many beginners stay upright and keep their heels down.
Make it harder
Once you can do 2 to 3 sets of 12 to 15 controlled bodyweight squats, try:
- Tempo squats: take three to four seconds to lower yourself
- Pause squats: hold the bottom position for two seconds
- Heavier goblet squats: add weight gradually with the same form
- Split squats: one leg at a time, which also challenges balance
- Barbell back or front squats: learn with light weight, use safety bars in a rack, and get coaching if you can
For beginners, the ACSM (American College of Sports Medicine) position stand on resistance training progression suggests 1 to 3 sets of about 8 to 12 repetitions, adding a small amount of load once you can do more reps than planned. Our beginner strength training plan shows how squats fit into a full week. Later on, the one-rep max calculator can estimate your strength without testing a true maximum.
Quick mobility checks
If you can't squat very deep, two checks can help you figure out why.
- Knee-to-wall ankle check: Half-kneel facing a wall with your front foot a few inches away and try to touch your knee to the wall without lifting your heel. If you can only manage it with your toes very close to the wall, tight ankles may be why your heels lift. Raising your heels on small plates is a common short-term workaround.
- Supported deep squat: Hold a door frame and sink as low as is comfortable. If you get much deeper with support, the limit is more likely balance and control than joint range.
If one side is clearly tighter or either check causes pain, see a physical therapist.
How often to squat
The Physical Activity Guidelines for Americans and the WHO both recommend muscle-strengthening activities for the major muscle groups on two or more days a week. Two or three squat sessions a week, with a day between hard sessions, is a reasonable start. That rest day gives your muscles time to recover and adapt, which is when you actually get stronger. For the bigger picture, see how much exercise you need per week.
Sources
- NSCA, Essentials of Strength Training and Conditioning
- American College of Sports Medicine, progression models in resistance training (2009)
This guide is general information for healthy adults, not medical advice. If you have a health condition, are pregnant or have pain, talk to a doctor or other qualified professional first. See the health disclaimer.